8 Portrait Photography Tips Every Photographer Should Know
Do you struggle to take professional looking portrait photos? In this tutorial you’ll discover eight highly effective techniques that will take your portrait photography to the next level. You’ll learn how to set up the scene for maximum impact as well as the best camera settings to use. By the end of this article you’ll be able to shoot stunning portrait photos with your DSLR or mirrorless camera.

1. Pick The Perfect Background For Your Subject
In portrait photography the background is just as important as the subject. A busy or distracting background will take attention away from the person in your photo.
Usually for portrait photography you’ll want a neutral, uncluttered background that won’t distract the viewer from your portrait subject.
However, you don’t have to choose a completely plain background. For instance, an interesting wall or fence could provide a wonderful pop of color or texture.
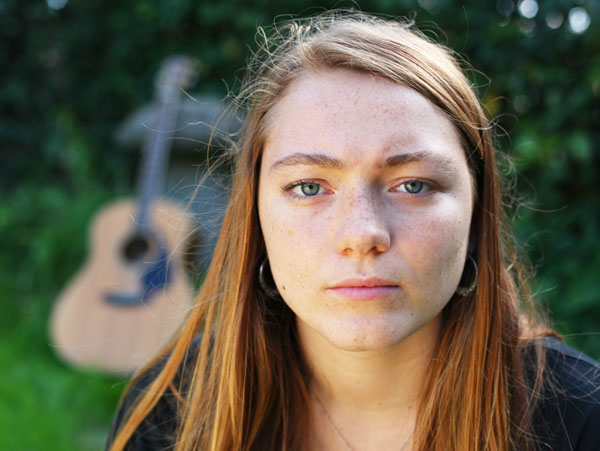
Another technique is to include an object in the background to provide added interest or context. For example, an artist in front of her easel, a fisherman in front of a boat or a musician in front of her guitar.
2. Prepare Your Portrait Subject For The Shoot
Even the best, most expensive camera equipment will produce poor results if your subject isn’t ready, comfortable, relaxed and feeling their best.
Being photographed is quite an unnatural and therefore stressful experience for the subject, so your job as a photographer is to make the experience simple, fun and stress-free.

Break the ice by making small talk. Even if you know the person well they may still be feeling apprehensive.
Explain the kind of shot you want – or ask them what kind of shot they’d like. Be open to suggestions from your subject.
For children portrait photography, get down to their level and talk to them gently. Tell them you’re going to have great fun. And encourage them to play and forget about the camera.
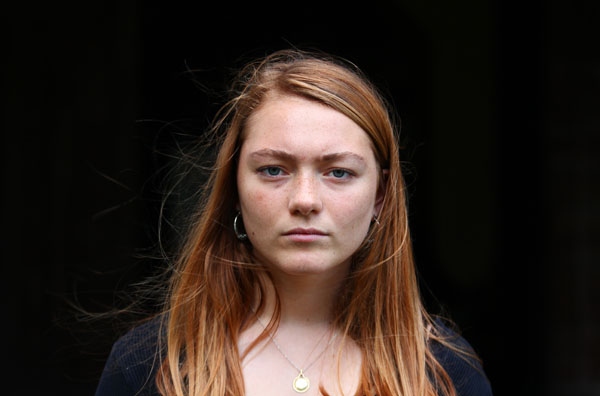
If possible ask your subject to wear neutral colors – preferably dark colors – because this helps your subject’s face stand out better.
Check your subject over for anything that might be distracting such as fluff on clothes, uneven buttons and zips, collars, lapels, clothes riding up, shirt half tucked in, etc.

One of the best preparations you can make is to be prepared yourself. Have your camera and any additional equipment set up, and take a few test shots before expecting your subject’s full attention.
3. Pose Your Portrait Subject Like A Pro
Now that your subject is ready, comfortable and relaxed you need to keep them that way throughout the shoot. Work quickly but confidently and calmly, giving them clear instructions as you shoot.
It’s unlikely they’ll know how to pose for you so you’ll need to give them constant guidance.
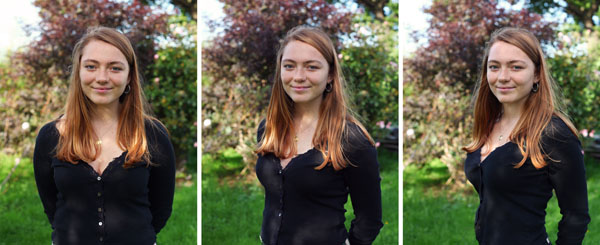
Don’t overwhelm them with complicated requests. Just get them to make small, simple adjustments, for example, “Raise your chin a little,” “Straighten your back,” or “Now look at me.”
Let’s explore some different posing techniques that you could try. Have your subject sit down. This keeps them still and they’ll feel more relaxed and comfortable.
Have the subject lean slightly towards the camera for a more engaging pose (or shoot slightly from above to get the same effect).
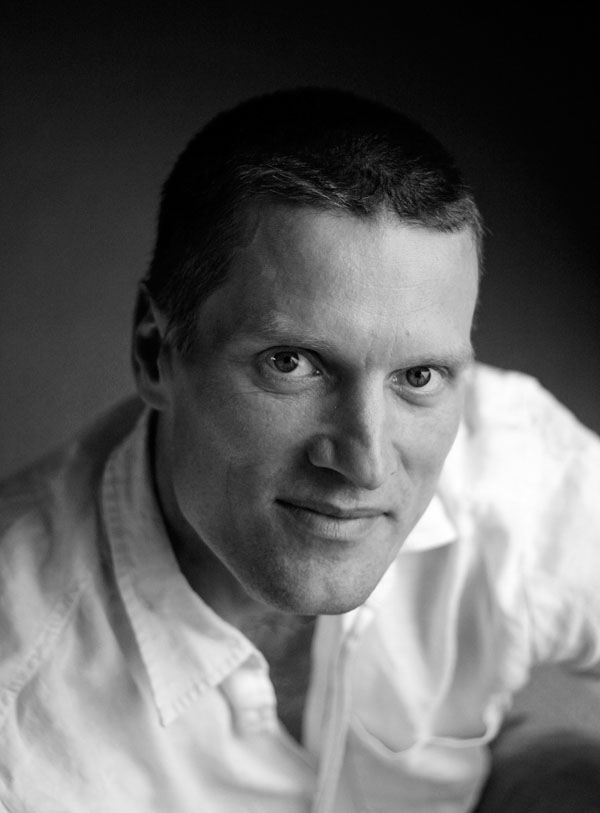
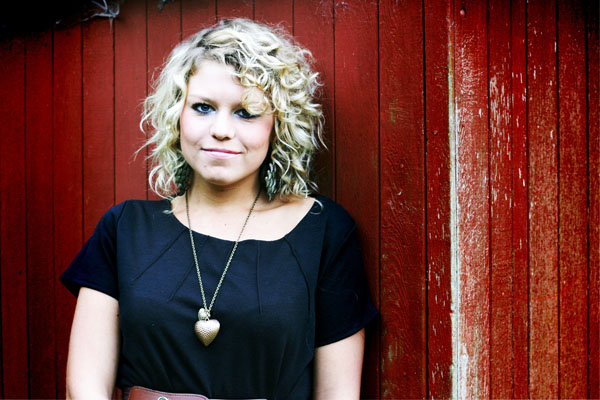
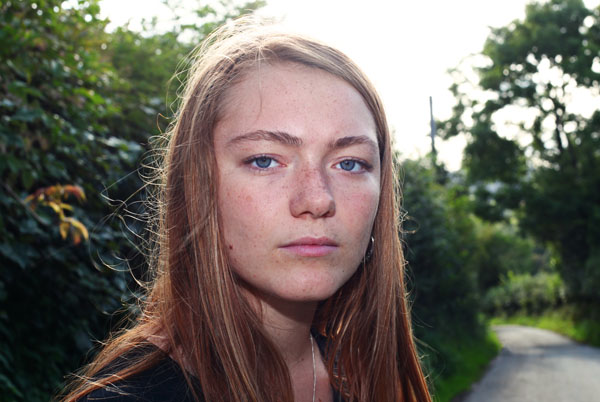
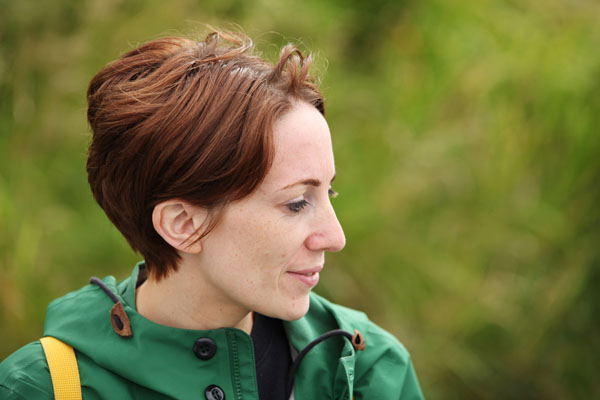
Have their body and shoulders turned slightly away from the camera for a natural feel. Or, for a more confrontational image, have their shoulders square-on to the camera as shown below.
For something a little different, shoot from an unusual perspective such as very low or very high.

Waists can look slimmer if the subject turns his or her waist away from the camera.
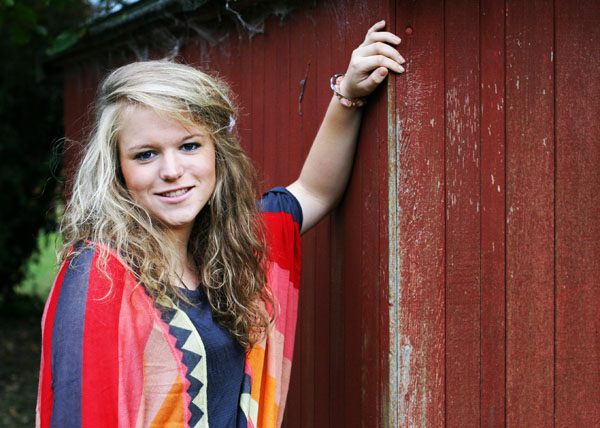
Introducing props is a great way to add something special to the shoot. These could include hats, party glasses, balloons, a pen, a flower or a musical instrument.
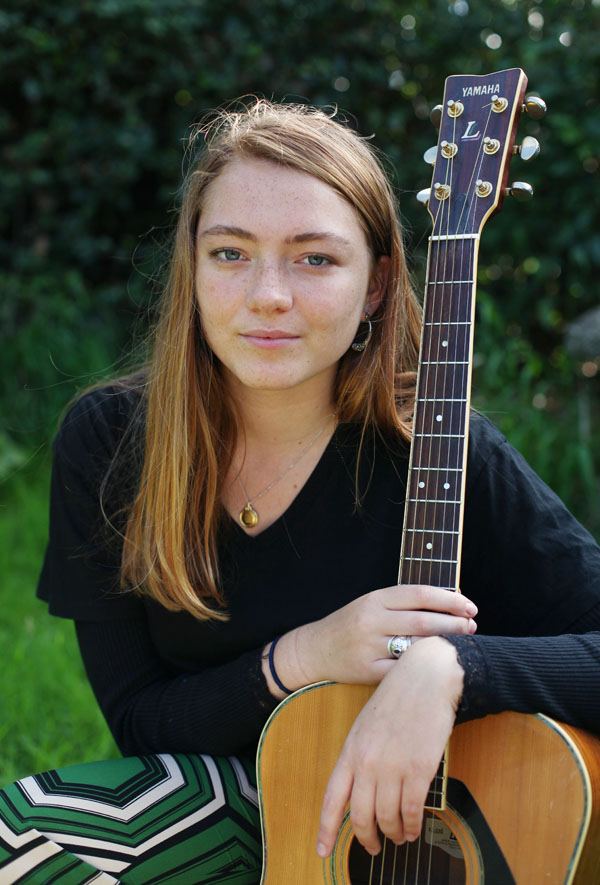
If nothing else it will help break the ice and lighten the mood – even if you don’t end up using the props in all your shots.
4. Ensure Your Subject Is Well Lit
Generally speaking, natural daylight is the most attractive light source for portrait photography – especially if you don’t have dedicated studio lighting.

A slightly overcast day provides a lovely soft light that will be flattering on your subject. Direct sunlight isn’t usually desirable because it creates strong, hard shadows on the subject’s face. In such conditions it’s best to find some light shade to position your subject.
Alternatively, embrace the opportunity and shoot (carefully) into the sun, with your subject’s back to the sun. This is called backlighting and can result in a golden glow around your subject.
Keep in mind that shooting into the sun does require you to provide some “fill” light to illuminate the shadows on your subject’s face.
Fill light can be reflected sunlight, bounced back onto the subject’s face using a reflector or even a simple sheet of white card. Alternatively you could use your camera’s inbuilt flash or an external flash as demonstrated above.
You can use natural daylight indoors too. For best results put your subject near a window, and have your subject facing slightly towards the light.

You’ll get shadows on the parts of your subject which aren’t lit by the light from the window. This can add depth and a sense of drama to the image.
If the shadows are too dark try bouncing some of the window light back onto these shadowy areas using a reflector.
5. Use A Flattering Focal Length
Focal length has a major impact on your images because it introduces a predictable amount of image distortion which can make or break your portrait photography.
Find out what focal lengths your lens offers by examining the lens barrel. The focal lengths are displayed in millimeters, e.g. 18mm, 55mm, etc. If you’re using a fixed or prime lens there will only be one focal length.
To select a focal length on a zoom lens, rotate the zoom ring on the lens barrel. If your camera doesn’t have a zoom ring, use the zoom +/- buttons on the camera body.
How do you know which focal length to use? There’s no right and wrong here, but the following information will help you decide which is best for you.

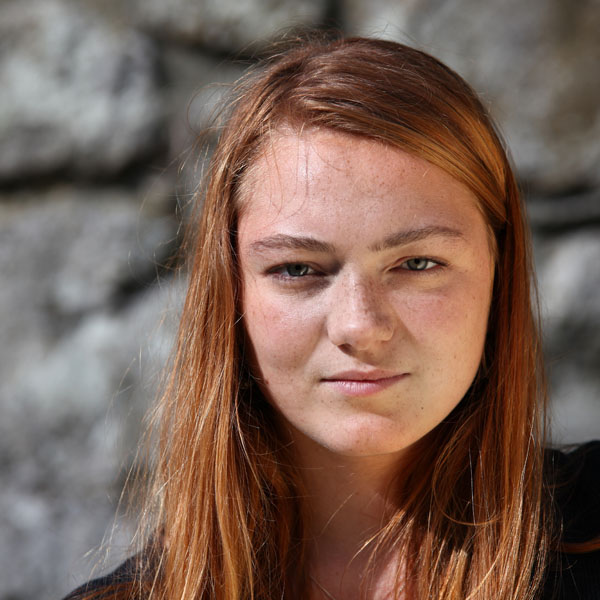
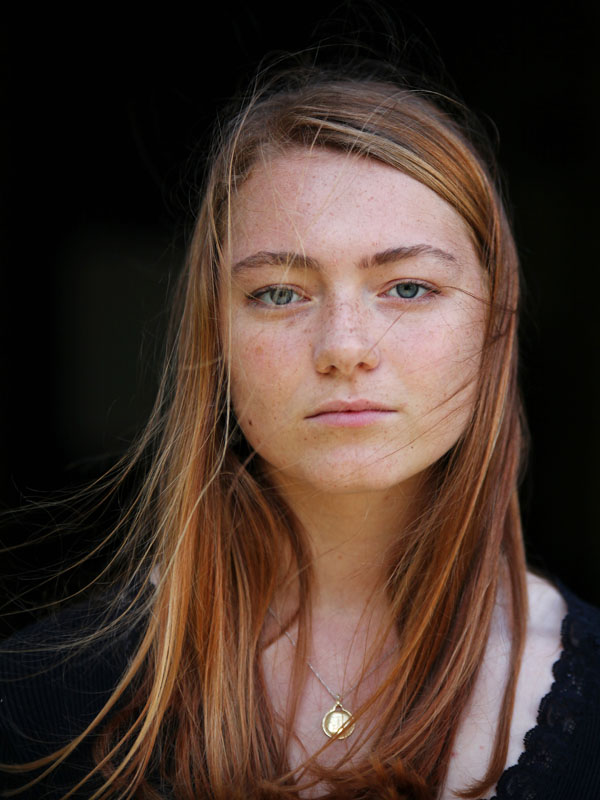
A 50mm focal length will give you the most accurate representation of your subject because it creates no distortion of their face. The photo above was shot with a 50mm prime lens.
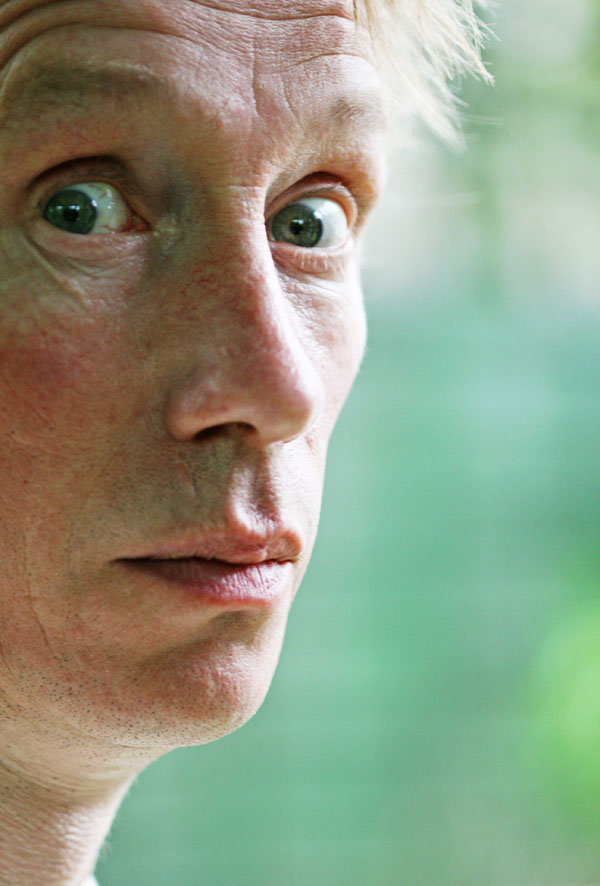
If you shoot with a focal length below 50mm you’ll start to see some undesirable distortion of the facial features. For example, the size of your subject’s forehead, nose and nearest cheek will be exaggerated while other features like ears, chin and hair appear to reduce in size, as shown below.
While this can produce amusing results it’s not usually desirable. In addition, you’ll need to get closer to your subject in order to fill the frame. This may be too close for comfort for you and your subject!
A focal length of over 50mm can make your portrait subject’s facial features start to appear flattened. In moderation this is quite flattering – but at extremes it can make the person’s face look very wide or fat. 80mm is a popular focal length for portraits although some photographers prefer 100mm or longer.
Also, the longer the focal length the further away from your subject you’ll have to be in order to fit them into the frame.
This can be beneficial when shooting candidly for more natural, relaxed results or if you feel your subject will benefit from having some space. However it could be a problem if you simply don’t have enough room to get far enough away from your subject – for example when shooting indoors.
6. Blur The Background Using Aperture Priority Mode
A sure-fire way to raise your portrait photography game is to shoot with a shallow depth of field. This allows you to have your subject in sharp focus while the background appears blurred or out of focus, helping your portrait subject stand out.
You can control the depth of field on your camera by adjusting the lens aperture. The aperture is the opening inside your lens which allows the light to travel through from the front of the lens to the camera’s sensor. Your lens will have a minimum and maximum aperture range.
Aperture is measured in f/stops. The bigger the lens aperture, the smaller the f/number will be. The larger the aperture (the smaller the f/number) the more blurred your background will be.

Generally speaking, you’ll want to choose the largest aperture (smallest aperture number) that your lens offers. F/4 is a go-to aperture for portraits as it should provide enough depth of field to have all of your subject in focus.
To change the aperture on your camera ensure you set the shooting mode to Aperture Priority or AV Mode.
Then use the thumb wheel, dial, buttons or menu settings to increase or decrease the aperture value. On my Canon 5D mk ii the aperture value is changed using the main dial just behind the shutter button.
You can experiment with smaller and larger aperture sizes but the golden rule is to make sure your subject’s eyes are in focus at the very least, and ideally the tip of the nose too.
If the background doesn’t look blurred enough, try moving the subject further away from the background. The further the background is from the subject the more blurred it will appear.
7. Expose For The Subject’s Face
Exposure refers to how bright or dark your image is. In portrait photography the most important part of the scene is the subject’s face. So, make sure that the face is correctly exposed – not too dark (under-exposed) and not too bright (overexposed).
For portrait photography it’s better to have a background that’s too dark or too bright than to have a face which is under or over lit.
Depending on which mode you’re shooting in you can easily adjust the exposure compensation (EV) setting on your camera. This enables you to increase or decrease the exposure to suit.

On my Canon 5D mk ii I hold down the ISO/flash +/- button with my right thumb and adjust the exposure compensation value using the main dial with my forefinger.
Alternatively, set your camera’s metering mode to Spot metering or Center-weighted metering. This tells the camera to ignore overly light or dark regions around the edge of the scene which might trick it into under or over exposing the shot.
8. Focus On The Eyes
Portrait photos look best if the eyes are in sharp focus. This improves the sense of eye contact between the subject and viewer, creating a powerful and engaging photo.
So, when shooting portraits, especially with a shallow depth of field, make sure you set your focus point carefully.

Your camera most likely has several Autofocus / AF points which are visible in the viewfinder. Select the central AF point using the AF option in your camera, then position the central focus point directly over one of the subject’s eyes.
Now half-press the camera’s shutter button to lock focus. If necessary, move the camera to recompose your shot for the best composition, then press the shutter button down to take the shot.
If recomposing, ensure you don’t change the distance between the camera and the subject otherwise the eye will no longer be in focus.

Many cameras offer the ability to magnify the scene in the viewfinder which is invaluable for checking focus before shooting.
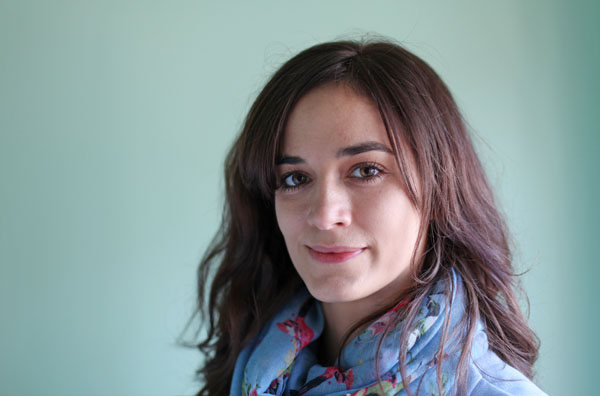
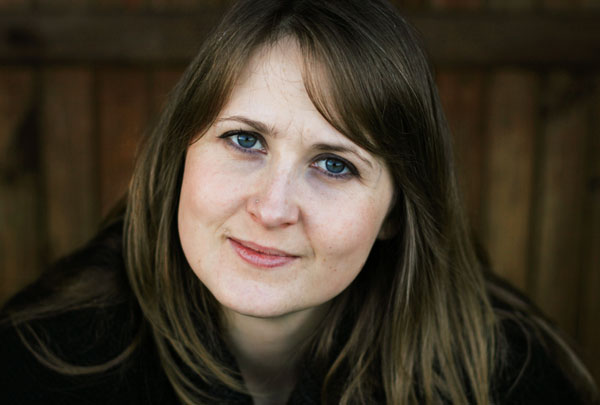
To really make your subject’s eyes “pop” try the following trick that all the best professional portrait photographers use. Simply ensure your light source is reflecting in your subject’s eyes, as shown in the photo below.

These reflections are called “catch lights” and they’re extremely effective at turning a boring portrait into something really special. For maximum effect, have only one catch light per eye and aim to have them nearer the top of the eye.
Portrait Photography Summary
In this tutorial you’ve learned eight important photography techniques that will help you shoot stunning portrait photos with your camera.
To summarize, take the time to find a good backdrop and ensure the lighting is adequate to illuminate your subject.

Make your subject feel at ease and try out different poses. You could even try adding some props to add visual interest and context.
Select a large aperture (small f/number) to create a shallow depth of field with a beautiful blurry background. Adjust the exposure compensation to correctly expose for the subject’s face.
Use a suitable focal length to ensure the subject’s features aren’t distorted, and ensure you set your focus point carefully. The most effective focus point is usually on the subject’s eyes.

Follow these tips and you’ll soon be creating beautiful professional-looking portrait photos with your DSLR or mirrorless camera.
https://photographypro.com/portrait-photography/
Comments
Post a Comment